
In this tutorial, we will use PowerPoint 2016, but if you have PowerPoint 2013 or 2010, it will be the same. Follow these steps to get started with Edit Points mode for any shape (rectangle, triangle, drawn shape, etc.) in PowerPoint (or you can watch the video tutorial on YouTube here):
Step 1:
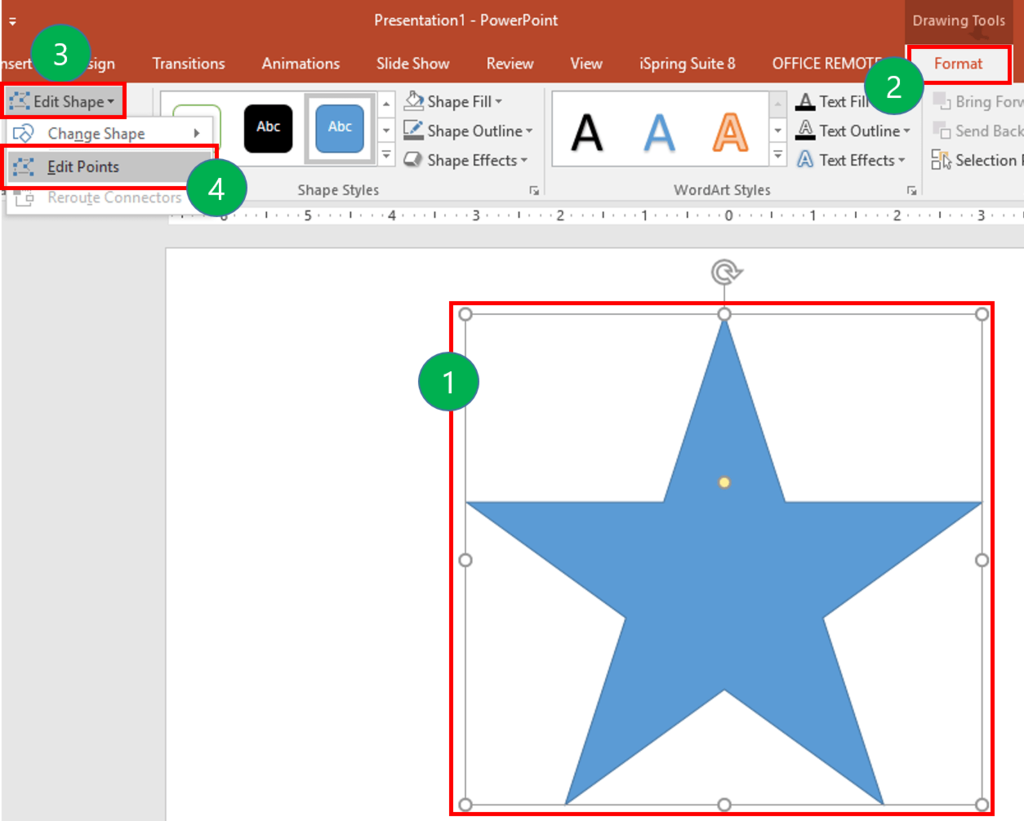
Select the drawing (1) so that the Ribbon area now shows the Drawing Tools Format tab (2). In this tutorial, I inserted star shape. Within the Drawing Tools Format tab, click the Edit Shape button (3) to view a drop-down menu. And, within Edit Shape drop-down menu, choose the Edit Points option (4).
Note: The Drawing Tools Format tab is a contextual tab. Contextual tabs are special tabs in the Ribbon that are not visible all the time. They only appear when you are working with a particular object which can be edited using special options.
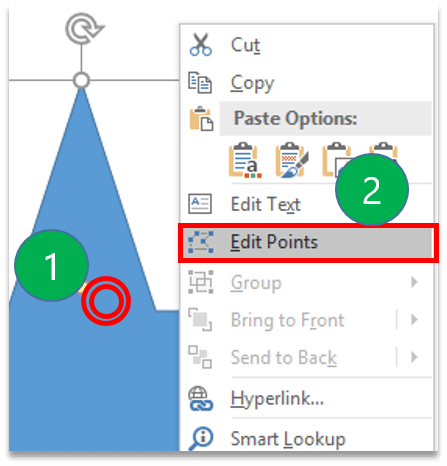
Alternatively, you can also right-click the shape, and then choose Edit Points option from the context menu, as shown in Figure 2, below.
Tip: Some shapes, especially a straight point-to-point line will not allow you to choose the Edit Points. It will make the Edit Points option grayed out.
Step 2:
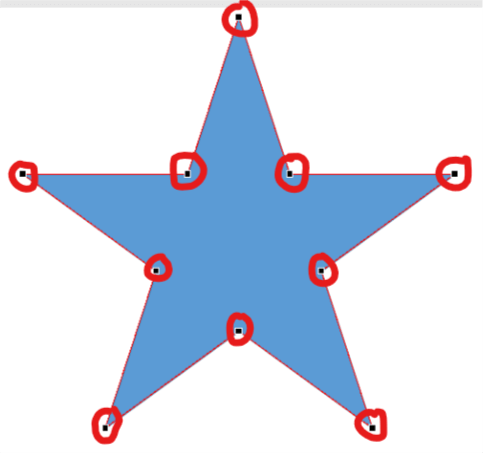
Either way, a number of small black squared points will appear on the outline of the shape, as shown in Figure 3 (below). These points are known as Vertexes, which mark any point in your shape that denotes an extremity of a curve or line segment, or even the start and end point of an open shape.
Step 3:
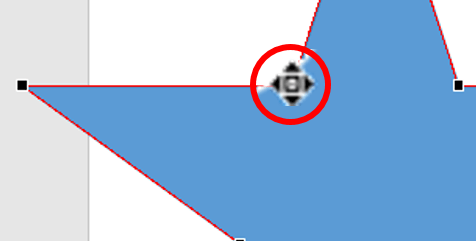
Place the cursor on any of the vertexes – the cursor will change to a small rectangle with four-directional arrows around it, as shown highlighted in red within Figure 4.
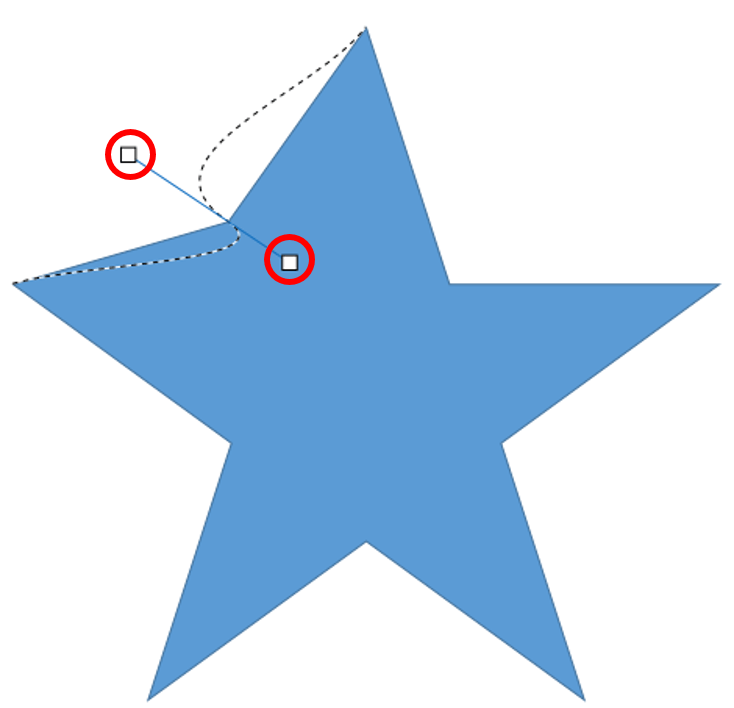
You can click the vertex and move or drag it to anywhere you want. Notice that when you drag the vertex, a black dashed line will appear, showing the changes to the shape that you are making, as shown in Figure 5.
Notice that when you select a vertex, one or two handles will appear too, as shown in Figure 5 (in red circles). We can use it to alter the degree of the curve or line on either sides of the vertex in relation to the next vertex along the line.

Step 4:
Click on one of the handles and drag them to reorient the line’s structure. It is also sometimes used to make curved shape.
Step 5:
Once you have re-positioned the vertex or reoriented the structure of the line as required, release the mouse button. You will see your new shape, as shown in Figure 7 below.

And, that’s all. You already have your custom shape 😀. Simple right? This is just the beginning. You can learn more about PowerPoint’s best feature for graphics editing here. You can also learn about how to use Merge / Combine Shapes in the next tutorial. Happy editing.
Remember: If you’re planning to save it as a picture and place it to your storage, just right-click on the shape/object, and then in the context menu, select Save as Picture...
